
Sarvangasana
Sarvangasana means «Position (Asana) for all (Sarva) Parts (Anga) of the Body». In English the exercise is also called «Shoulder Stand» or «Candle». The «Sarvangasana» is an Asana from Hatha Yoga, which belongs to the 84 main Asanas. The «Shoulder Stand» is a Reverse Posture and the 2nd Asana of the 12 Basic Postures of the Yoga-Vidya Series. The Counter Position for this is «Matsyasana», the «Fish».
 Shoulder Stand
The «Sarvangasana», the «Shoulder Stand», mobilizes the upper spine and shoulder joints, strengthens the lower back and arms; in addition, the «Sarvangasana» reduces stress and tension by thoroughly stretching of the back muscles. The increased blood supply to the brain through «Sarvangasana» as well as the balancing influence on the thyroid gland, which regulates the metabolism, can renew the vitality in the whole body within a short time.
By stimulating the thyroid gland and stretching the cervical spine, the nervous system will be also calmed. Thus the «Shoulder Stand», the «Sarvangasana», is an Asana that promotes balance and calmness, whereas the «Shirshasana», the «Headstand», has an activating effect. The «Sarvangasana» helps your body to regenerate and gives you a feeling of harmony and unity.
Table of contents
1 Instruction in the Sarvangasana, the Shoulder Stand
1.1 Video with variations of the Sarvangasana, the Shoulder Stand1.
2 Effects of the Sarvangasana, the Shoulder Stand
2.1 Physical Effect of the Sarvangasana, the Shoulder Stand
2.1.1 Stretched Muscles in the Sarvangasana
2.2 Mental Effect of the Sarvangasana, the Shoulder Stand
2.3 Energetic Effect of the Sarvangasana, the Shoulder Stand
2.3.1 Particularly addressed Chakras in the Sarvangasana, the Shoulder Stand
3 Swami Sivananda about the Sarvangasana
4 The Sarvangasana
5 The Shoulder Stand — Adjustments and Preliminary Exercises
5.1 Preliminary Exercises to strengthen the Back Muscles as a Preparatory Exercise for the Shoulder Stand
5.2 Adjustment to Minimize Pressure in the Neck
5.3 Video on the Supported Shoulder Stand
6 Videos on Shoulder Stand or Sarvangasana — Practical Instructions
6.1 Video Shoulder Stand — Sarvangasana Supported with Cushions
6.2 Video Shoulder Stand or Sarvangasana incl. Plough and Loosening Exercises — Exercise Sequence
6.3 Video Shoulder Stand – Plough – Bridge – Wheel – Fish — Exercise Sequence
7 Videos on the Subject of Sarvangasana
7.1 Sarvangasana, Position of all Parts
7.2 Shoulder Stand, Sarvangasana Assistance
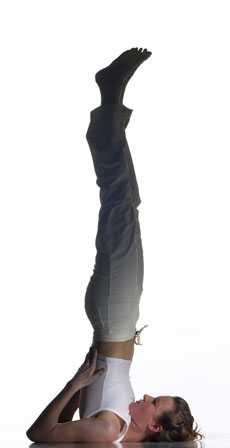
Instruction in the Sarvangasana, the Shoulder Stand
➳1. Lie on your back, legs closed, arms beside your body and palms down.
➳2. Lift your legs and the pelvis with the inhalation. As soon as the buttocks rise from the floor, support the lower back firmly with both hands. Keep thereby your elbows as close together as possible. Breathe rhythmically and continue to lift your back and the legs.
➳3. Move your hands more towards the shoulder blades and bring the chest as close to the chin as possible. Try to align your back, hips and legs. Breathe slowly into your belly and relax your feet and legs as much as possible. Hold the position as long as it is comfortable — 30-60 seconds is enough at the beginning. If you are a beginner, you can stay in the position for about 10 seconds. If you feel that you are becoming more and more comfortable in the position, you can gradually increase the time until it reaches 3 minutes.
➳4. To get out of the position, lower both arms and press them firmly into the floor for better balance. Bend your legs slightly backwards and roll with your back down vertebra by vertebra using your arms as brakes. As soon as the buttocks touch the floor, use your abdominal muscles to slowly lower your legs to the floor.
➳5. To release the tension in your lower back, you can bend your legs towards your chest after «Shoulder Stand». Wrap your arms around your knees and grasp the other wrist with one hand. Take a few deep breaths into your belly. Then release the arms and legs and relax in the «Position of Dead».
If you have a neck injury or your period, you should avoid the «Shoulder Stand». If you are over four months pregnant, you can practice the variation of the «Half Shoulder Stand», which you can best learn from a Yoga Teacher who specializes in Pregnancy Yoga.
Video with variations of the Sarvangasana, the Shoulder Stand
 |
 |
Effects of the Sarvangasana, the Shoulder Stand
Physical Effect of the Sarvangasana, the Shoulder Stand
The «Sarvangasana» (also called «Shoulder Stand» or «Candle») normalizes the function of the thyroid gland and thus the metabolism in the whole body. The «Sarvangasana» helps to maintain a youthful figure and smooth skin. Stomach upset and varicose veins disappear. The «Sarvangasana» is good for the female sexual organs. The spine remains or becomes flexible. Neck tensions are dissolved. The «Sarvangasana» has many effects of the «Shirshasana» (the «Headstand»), which are based on the Reverse Posture. Admittedly, the «Shirshasana» is more activating, the «Sarvangasana» more calming.
Stretched Muscles in the Sarvangasana
➳Longissimus (back extensor)
➳Trapezius (hooded muscle)
➳Neck muscles.
Mental Effect of the Sarvangasana, the Shoulder Stand
The «Sarvangasana» conveys a feeling of wholeness (Sarva = all; Anga = parts). It helps you to accept yourself and your life as it is.
Energetic Effect of the Sarvangasana, the Shoulder Stand
The «Sarvangasana» regenerates the «Prana». Like the «Shirshasana» it is considered a rejuvenating exercise. The Sarvangasana» can also be practiced after a strenuous day at work to regain new energy.
Particularly addressed Chakras in the Sarvangasana, the Shoulder Stand
➳Vishuddha Chakra
Swami Sivananda about Sarvangasana
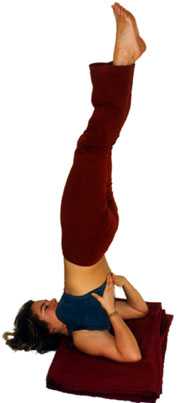
Method
Spread a thick sheet on the floor and practice this Asana on the sheet. Lie flat on your back. Lift your legs slowly. Raise the torso, hips and legs to the relative vertical. Support the lower back with your two hands, one on each side. Keep your elbows on the floor. Press the chin against the chest to form first the chin lock, «Jalandhara Bandha». Allow the parts of the back, shoulder girdle and neck to touch the floor close. Do not allow the body to wiggle back and forth. Keep the legs straightened. When you leave the Asana, bring your legs back to the floor very slowly with elegance and not jerkily. Perform the Asana gracefully and comely. In this Asana, the whole weight of the body will brought on the shoulders. You really stand on the shoulders with the support and help of the elbows.
Focus you on the thyroid gland, which is located on the front of the lower neck. Hold your breath as long as it is comfortable for you, then exhale slowly through the nose.
You can practice this Asana twice a day, in the morning and in the evening. This should immediately be followed by the «Matsyasana» («Position of the Fish"; Sanskrit: matsya (m.) = Fish). This will dissolve pain in the neck area and deepen the usefulness of the «Sarvangasana Practice». Practice this posture for 2 minutes initially and gradually expand it until you hold it for half an hour.
Impacts
During this Asana the thyroid gland, which plays an important role in the metabolic process, growth, food conversion and body structure, will well supplied. A healthy thyroid gland is synonymous with a healthy circulation, healthy respiratory tract, a well-functioning digestive system, a healthy urogenital and nervous system of the body. The thyroid gland works in conjunction with other endocrine glands such as the pituitary gland, the pineal gland in the brain, the adrenal gland above the kidneys, the liver, the spleen and the testicles. When the thyroid gland becomes diseased, all other endocrine glands suffer as well. Thus a «vicious circle» becomes created. The «Sarvangasana» keeps the thyroid gland healthy. A healthy thyroid gland means that the organs in the body are working well.
I have taught this Asana to hundreds of people. I have initiated a real «Sirsha Sarvanga Propaganda». In general, I advise all those who come to me, without exception, to do these two Asanas in combination with the «Paschimottasana». These three Asanas alone can keep you in perfect health. You do not need long walks or other physical exercise. Without exception, everyone has told me about the beneficial results of these mysterious and wonderful Asana. As soon as you come out of the Asana it gives you new strength and gives you a vibrant healthy complexion. This is the ideal tonic.
In this Asana the nerve endings of the spine are supplied with a lot of blood. It is the Asana that bundles blood in the spine and guarantees an excellent supply. But in this Asana there is no fixed rule that exactly this amount of blood is supplied to the nerve endings.
The asana keeps the spine very flexible. Flexibility in the spine is synonymous with perpetual youth. It protects the bones from early hardening (which can lead to osteoporosis). In this way you will preserve and maintain your youth for a long time. This Asana virtually destroys the devastating effects of aging. The «Sarvangasana» is very helpful in maintaining the «Brahmacharya».
Like the «Sirshasana», the Asana makes you to an «Urdhvareto-Yogi». This Asana successfully stops wet dreams. It acts as a powerful blood tonic and cleanser. It regulates the nerves. With this Asana you have an inexpensive, directly available blood, nerve and digestive tonic. You will not have to pay a doctor. If you don't have much time to do a whole sequence of Asanas, practice the «Sarvangasana» daily without exception together with the «Sirshasana» and the «Paschimottanasana». This is very useful for gonorrhea and other diseases of the bladder and ovaries. The Asana eliminates sterility and diseases related to the uterus. Ladies can practice this Asana just as safely. The «Sarvangasana» awakens the «Kundalini» and heats «Jatharagni» (the digestive fire). In this way the «Sarvangasana» eliminates digestive problems, constipation and other gastro-intestinal problems of a chronic nature. The «Sarvangasana» energizes, revitalizes and stimulates.
SARVANGASANA
The Sanskrit name of the «Shoulder Stand» is «Sarvangasana», which means «a posture that favors all parts of the body». The «Shoulder Stand» helps to release your mental energy. Practice it every day when you work on the computer or spend a lot of time with standing. When you are in the posture, you will notice your chin pressing against your neck. The «Shoulder Stand» strengthens and balances your thyroid gland, which is located in your gorge. Your thyroid gland controls the metabolism and all the other endocrine glands. The energy is concentrated in your «Throat Chakra».
The «Sarvangasana» helps to drain stagnant blood in your lower limbs. The cervical area of your spinal cord stretches, as well as your shoulders and upper back muscles. Many people find that the «Shoulder Stand» is an excellent remedy for a tensed neck and stiff shoulders. There is new evidence that this position can heal even torn rotator cuffs. To enter the «Shoulder Stand», start by lying on your back. Make sure that you are at least one meter away from the wall. Bring your legs together and lift them up at a 90 degree angle.
The Shoulder Stand — Adjustments and Preliminary Exercises
Preliminary Exercises to strengthen the Back Muscles as a Preparatory Exercise for the Shoulder Stand
In order to maintain balance in the «Shoulder Stand», the lower back muscles must remain tensed. This requires a relatively large amount of force, which only gradually develops in the muscles. Sometimes, therefore, the lower back muscles are overstrained during or after «Shoulder Stand» exercises. The following adjustments can therefore be useful to help you get used to this Basic Position.
Avoid fatigue in the lower back: Perform steps 1-3 of the Basic Position as normal, but then slowly bend the legs and lower the knees to the forehead to relieve the lower back muscles. After a few breaths, lift your legs again and continue with steps 4-5.
Please do not worry about excessive pressure that could be exerted on the upper cervical vertebrae when standing in the «Shoulder Stand». Most people are not mobile enough to bring their backs into a fully upright position in the «Shoulder Stand». This means that most of the body weight rests on the elbows and not on the neck. Only in the fully upright «Shoulder Stand», when the chest presses firmly on the chin, will the weight shifted to the neck and shoulders.
By pulling the shoulder blades closer together, the muscles and skin of the shoulders move closer to the cervical vertebrae, thus reducing the direct pressure of the weight on the neck. The following adjustment shows you how.
Adjustment to Minimize Pressure in the Neck
Avoid excessive pressure on the neck: Carry out steps 1-3 of the Basic Position as usual. As soon as you are in the «Shoulder Stand» lower carefully both arms to the floor, keeping thereby your balance. Interlock your fingers, press your palms together and press thereby your extended arms firmly into the floor. This brings your elbows and shoulder blades closer together, protecting your neck in this way. Keep your elbows in this position and then bend your arms to support your back again with both hands. Continue with steps 4-5 of the Basic Position.
Video on the Supported Shoulder Stand
|
|
Videos on Shoulder Stand or Sarvangasana — Practical Instructions
Video Shoulder Stand — Sarvangasana Supported with Cushions
Here Sukadev guides you to the «Shoulder Stand» or the «Sarvangasana» with pillow support and shows you how to perform this Yoga Posture optimally. This is an excerpt from the Third Course Video of the 10-week Beginners Course.

|
|
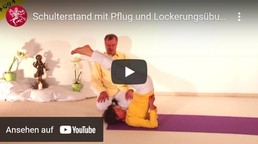
Video Shoulder Stand or Sarvangasana incl. Plough and Loosening Exercises — Exercise Sequence
Here Sukadev guides you to a combined «Shoulder Stand»-«Plough» Exercise Sequence, where the «Shoulder Stand» or «Sarvangasana» is performed supported by cushions and is followed first by the «Half Plough» and then the «Plough» in the Basic Position. Sukadev explains you how to perform this Yoga Exercise Sequence optimally and then combine it with various Relaxation Exercises. This is an excerpt from the Fourth Video of the 10-week Beginners Course.
|
|
Recommended Yoga Counter Position or Follow-Up Exercise: «Fish» or «Matsyasana», one of the recommended Counter Positions for «Shoulder Stand» and «Plow».
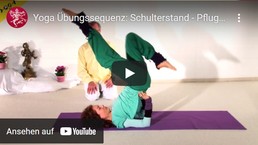
Video Shoulder Stand – Plough – Bridge – Wheel – Fish — Exercise Sequence
This Yoga Exercise Sequence is an excerpt from a Yoga Class: Sukadev guides you to an Exercise Sequence and shows you how to combine the positions «Shoulder Stand», «Plough», «Bridge», «Wheel» and «Fish» in an optimal way to an Exercise Sequence.
This is an excerpt from the 8th Course Video of the 10-week Beginners Course. More information can be found under the respective exercises such as: and
|
|
Videos on the Subject of Sarvangasana
Sarvangasana, Position of all Parts

|
|
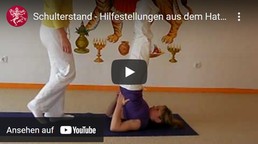
Shoulder Stand, Sarvangasana Assistance
|
|
